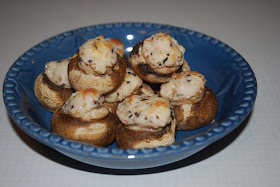
Since today is October 1st and October first in Homemade Cookie Day I decided to try out a recipe for a yummy Fall treat-
Pumpkin Chocolate Chip
Cookie Sandwiches
Ingred;
1/3c. olive oil
7.5 oz (about 3/4c.) pumpkin
1 egg
3/4c. sugar
2t. vanilla
3c. flour
1t. baking soda
1t. baking powder
1/2t. salt
1c. mini chocolate chips :)
Cream Cheese Frosting- I got my recipe from here- What's for Dinner?
Heat oven to 375.
Mix together oil, pumpkin, egg, sugar and vanilla. Stir in flour, baking powder, soda and salt. Stir in the chocolate chips.
Using a large scoop put scoopfuls onto a greased cookie sheet.
Bake for about 10 minutes. Cool.
Spread cream cheese frosting onto the flat surface of one cookie top with the flat surface of another. Enjoy :)
Life is but a Series of Steps. Some are strong & confident, some are slow & hesitant. Sometimes you stumble, sometimes you run. But you just need to keep going, & it's always great to find a special person, or 2 to hold your hand along the way.
Wednesday, September 30, 2009
Reading Time!
I am Co-Author of a brand new online book club! One of the other Authors is a great Blog Buddy of ours- Chicago Mom from What's for Dinner?
We are starting it this October, it's all set up and ready go!
As I have probably mentioned before I LOVE to READ! I might even love to read more than I love to cook, it's a pretty close tie :)
I know that some of my Blog Buddies are also book lovers so I wanted to invite all of you who would like to join us to come on over and read at-
One Book at a Time
Rach's Baking Challenge- CHOCOLATE
This had to be the best baking challenge so far, how can you go wrong when the ingredient is chocolate??? I swear the hardest thing about this challenge was deciding what to post!
I finally decided on an old favorite with a new topping, Cherry Chocolate Cake from Allrecipes.com topped with Chocolate Almond Whipped Cream. Which is MUCH better than frosting folks :)
I have entered in Rach's Baking Challenge twice now and it is so much fun! If any of you are bakers, beginning or advanced you need to check it out. It's very easy to enter so go check it out!
Cherry Chocolate Cake
Ingred;
1/2c. butter
1-1/2c. sugar
2 eggs
1t. almond extract
1/2c. cocoa powder
1-3/4c. flour
1-1/4t baking soda
1t. salt
1 (21oz) can cherry pie filling
Heat oven to 350. Lightly grease and flour a 9x13 pan.
Cream the butter and sugar until fluffy. Mix in eggs and extract, beat well. Add in the cocoa powder.
Stir in the cake flour and baking soda. Gently stir in the pie filling. Pour batter into the cake pan and bake for 30-35 minutes.
Chocolate Almond Whip Cream
Ingred;
1c. cream
1T. cocoa powder
1T. brown sugar
1/2t. Almond extract
Whip all together until fluffy.
Monday, September 28, 2009
What happens when you are a Forgetful Fool
So Yesterday I decided to make bread, I got out all the ingredients, mixed it all together. I was thinking to myself how quick and easy it was. How the dough turned out perfect, not too sticky not too dry. I put my dough in a bowl to rise and started cleaning up, I was wiping the counter when I noticed a carton of eggs sitting on the counter, eggs? hmmm why are those out? Did my recipe call for eggs? Did I put eggs in it?
So I grabbed the recipe, which was sitting on the eggs, yep called for 1 egg, nope I didn't put an egg in it. Dang! What now? Should I try to mix in an egg?? Ummmm no probably not a good plan. Should I toss it or just cook it anyway?
I decided to cook it anyway to see if it would work, then I mixed up another batch of dough. You know, so that I could do the whole scientific thing and compare the 2. Cause apparently I wanted to spend all day in the kitchen, I am such a goof.
So here is my eggless bread-
Here is my follow-the-recipe bread-
They look pretty similar, they taste very similar too! The one without the egg is a bit crumblier, and I decided that next time (this recipe is a work in progress) I will be adding a little more sugar and 1 or 2 more eggs- if I remember them that is!
But if you wanted to make eggless bread, because of allergies or you want to make bread and have no eggs ( been there) this recipe will work! Yay! :)
Easy Homemade Bread
Ingred;
2c. milk
1/2c. butter
1-1/2t. salt
1/4c. sugar
2 1/2T. yeast
2/3c. warm water
1 egg
7c. flour
Place milk in a heat proof bowl, microwave on high for 3 minutes. Stir in the sugar, salt and butter. Let set until butter is melted in. Mix together the water and yeast, let set until creamy.
Mix the yeast and egg into the milk mixture.
Place the flour in your mixer bowl, turn on the mixer, slowly pour in the milk mixture. Mix until well combined, let the mixer continue to knead the dough for a few minutes. Turn dough into an oiled bowl, cover and set somewhere warm, let it rise until doubled- about 30 min.
Heat oven to 350. Shape loaves, place in oiled bread pans and let rise until dough reaches the top of the pans.
Bake about 30-40 minutes.
While we are on the subject of eggs, or the lack of, this morning for breakfast Mr K and I tried a new recipe for eggs, it was a big hit! I'm sure we will be making this one a lot :)
Shirred Eggs
Ingred;
eggs
butter
cream
salt and pepper
shredded cheese
Butter each small ramekin, place about 1T.cream in the bottom of each one. Place on egg in each. Sprinkle with salt and pepper and cheese (if you want cheese, they do cook about 5 minutes quicker without the cheese).
Place in oven, 350, for 15-20 minutes. Enjoy.
Saturday, September 26, 2009
Baked Crab Rangoon
What a strange name, I am never sure if I am saying it right, lol. This is my favorite appetizer to get at our little local Chinese food restaurant, I found a recipe on the Kraft web site and decided to give them a try. I made them to take to a Girls Night Out that I went to. It was a lot of fun, and they turned out pretty good :)
Baked Crab Rangoon
Ingred;
6oz crab meat
4 oz cream cheese
2 green onions sliced
1/4c. mayo
12 wonton wrappers
Heat oven to 350. Mix first 4 ingred. Spray 12 muffin cups with pam, line each with a wonton wrapper. Fill with the crab mixture. Bake 18-20 minutes until wontons are golden and filling is heated through.
I used my mini muffin pan, to mix the ingred. I put them all in a lg zip baggie, with a little asian seasoning, then squished it all together. Then a cut off a corner of the baggie and squeezed the filling into my cups. Clean up was easy :)
I wanted to sprinkle a little Mrs. Dash on these but I'm either all out or it's hiding in my cupboard somewhere, oh well :) :) :)
More Mochi, More 'Shrooms and 5 Words from Willoughby
I made a Pumpkin Mochi Cake, I got the recipe from Allrecipes, there are quite a few Mochi recipes on there. Just type Mochi in the search box and check them all out! The picture isn't all that great but it was definitely a hit here at my house.
Preheat oven to 350. Lightly grease a 9x13 pan.
Sift together the mochiko, baking powder, and sugar in a large bowl. Mix together the eggs, pumpkin, milk, butter and vanilla. Stir this mixture into the dry mixture. Pour into the pan.
Bake for 1 hour, cool before serving.
I enjoy pumpkin desserts, and I really liked this but I think the Lemon Mochi is my favorite still :) :) :)
I made some 'shrooms tonight, they got a little overdone but were still tasty. I used the Parmesan puff filling I had leftover from yesterday in them, it worked really well. I wouldn't have overbaked them, they smelled so yummy I knew they were done, but I was distracted by a giant spider in my kiddos game cupboard. Yuck.
I received 5 words from Willoughby to play along in a Game.
If anyone else wants to play let me know and I can give you five words.
#1-Cold, I like the cold, not freezing cold exactly just chilly cold. My Mom has always called me a heater, because from the time I was really small I was always very, very warm blooded. As a Teen my family always made me keep my bedroom door closed because I liked to keep my windows open year round, even in winter. I grew up in Montana remember so it got pretty chilly in there at times.
#2-Light, I am a big fan of natural lighting. I like to leave the lights in my house off until it's almost too dark to see because I don't like the fake light. Hubby thinks I'm strange, so I tell him it only looks so dark because he is getting old, lol.
#3-Painting, I wish I could paint. Landscapes, Seascapes ( anything with escape in it sounds good to me :) I even took painting classes once a week for almost a year. And I still can't paint, I gave up the day I realized Miss B's paintings looked better than mine.
#4-Change, as most of you know I am not a big fan of change. I would like it if things stayed the same, and never changed :)
#5-Inspire, My children are my biggest inspiration. Everyday they inspire me to be better, I am constantly amazed by how giving and sweet they are to each other and those around them. They Inspire me everyday.
Pumpkin Mochi
Ingred;
2-1/2c. mochiko
2t. baking powder
2c. sugar
4 eggs
1- 30 oz can pumpkin
1- 14oz can sweetened condensed milk
1c. melted butter
2t. vanilla
Ingred;
2-1/2c. mochiko
2t. baking powder
2c. sugar
4 eggs
1- 30 oz can pumpkin
1- 14oz can sweetened condensed milk
1c. melted butter
2t. vanilla
Preheat oven to 350. Lightly grease a 9x13 pan.
Sift together the mochiko, baking powder, and sugar in a large bowl. Mix together the eggs, pumpkin, milk, butter and vanilla. Stir this mixture into the dry mixture. Pour into the pan.
Bake for 1 hour, cool before serving.
I enjoy pumpkin desserts, and I really liked this but I think the Lemon Mochi is my favorite still :) :) :)
I made some 'shrooms tonight, they got a little overdone but were still tasty. I used the Parmesan puff filling I had leftover from yesterday in them, it worked really well. I wouldn't have overbaked them, they smelled so yummy I knew they were done, but I was distracted by a giant spider in my kiddos game cupboard. Yuck.
I received 5 words from Willoughby to play along in a Game.
If anyone else wants to play let me know and I can give you five words.
#1-Cold, I like the cold, not freezing cold exactly just chilly cold. My Mom has always called me a heater, because from the time I was really small I was always very, very warm blooded. As a Teen my family always made me keep my bedroom door closed because I liked to keep my windows open year round, even in winter. I grew up in Montana remember so it got pretty chilly in there at times.
#2-Light, I am a big fan of natural lighting. I like to leave the lights in my house off until it's almost too dark to see because I don't like the fake light. Hubby thinks I'm strange, so I tell him it only looks so dark because he is getting old, lol.
#3-Painting, I wish I could paint. Landscapes, Seascapes ( anything with escape in it sounds good to me :) I even took painting classes once a week for almost a year. And I still can't paint, I gave up the day I realized Miss B's paintings looked better than mine.
#4-Change, as most of you know I am not a big fan of change. I would like it if things stayed the same, and never changed :)
#5-Inspire, My children are my biggest inspiration. Everyday they inspire me to be better, I am constantly amazed by how giving and sweet they are to each other and those around them. They Inspire me everyday.
Friday, September 25, 2009
A beautiful Lemon Dessert and a Duo of Beautiful Awards
I have had this recipe stuck to my fridge for at least 2 months, I don't know why it took me so long to make it was actually pretty quick and easy. Which makes it a perfect one for me, I am going to use this as my base and see how many different flavors I can turn it into : )
Lemon Pots de Creme
Ingred;
2c. cream
1 whole egg
3 egg yolks
1/3c. sugar
2t. lemon extract
Heat oven to 350, place a 9x13 pan in the oven to heat. Start a tea pot up to get some water boiling.
Place cream in a heat proof bowl, microwave for 4-5 minutes until it starts to boil. While that is heating whisk together the all the eggs and the sugar, when the cream is ready whisk in a small amount to temper your eggs. Then whisk the eggs into the hot cream. Whisk in the extract.
Pour into 6 small ramekins, place in your heated 9x13 pan and set in the oven. Pour the boiling water into the 9x13 pan until the water reaches half way of the sides of your ramekins. Cover loosely with tin foil. Bake for 30 min. remove from pan, cool, chill in the fridge overnight. Sprinkle with powder sugar before serving.
Purple Hoodie Chick very sweetly awarded a couple of awards the first one is the
BINGO Award.I got the B for beautiful and I for Informative, Thanks P H Chick!
This award was started by Bookin With BINGO and
here are the rules: This "B-I-N-G-O" BEAUTIFUL BLOG AWARD
means that this blog is...
B: Beautiful - Goes to Willoughby, she always has such beautiful thoughts and pictures. She is such a genuinely beautiful person inside and out :) And because I know Willoughby has already recieved this award I also want to give this to Holly- because she leaves me such beautiful comments :) This stop Willoughby
What are we going to Eat?
I: Informative -Here I had a tie, I hopes that's ok, Luis and 5th Sister always post such great info, I always come away from their blogs a little bit more informed :) Muddy Runner 5th Sister
N: Neighborly - Betty always leaves me such sweet neighborly comments, I feel like I could walk out my front door walk across the street and tell her all my woes and she would take care of me :) A Corgi in Southern California
G: Gorgeous - Goes to Monica and Brandi for the absolutely gorgeous Cakes and Desserts they post :) Lick the Bowl Good Cakes-a-nonymous
O: Outstanding - Chicago Mom is such an outstanding on the ball Gal, she always has a great menu planned out every week. Recipes too! I always know where to look when I am trying to figure out what to make for dinner :) What's for Dinner?
This reward I have had before so I am going to link you to my other post Honestly Me
And I want to pass this award to-
1-Chicago Mom
2-Lee at I want to make that!
3- Mini Baker
4-Stephanie
5-kyslp
6-Betty
7- My Hubby
The rules can be found on my previous post along with my 7 things about me!
Thanks again Purple Hoodie Chick!
Parmesan Puffs and Focaccia
I have been trying to use some of the recipes from my Allrecipe collection that I keep adding to, every time I go on there I end adding at least 2! I will never get caught up at this rate :)
The two I just tried are-
Parmesan Puffs
Easiest Focaccia Recipe
Tonight I am making a pizza casserole recipe from there, that will make my total for today 3 I am slowly making headway, I will keep you posted on that one :)
So here is the Focaccia Bread, it didn't brown up very well but it was pretty good. I think next time I will double the sugar and add a little salt to the dough, we'll see what that does. Because as the recipe stated it's "Extremely easy, fast and cheap" see it's right up my alley :)
Easiest Focaccia Recipe
Ingred;
1t. sugar
2-1/2T. yeast
2/3c. warm water
2c. flour
olive oil
salt
toppings
Dissolve sugar and yeast in warm water, let stand until creamy. Mix in the flour, stir until well combined. Knead for a few minutes, I let my Kitchen Aid do that for me :)
Place dough in a bowl that has been lightly oiled and let raise for about 30 min. Heat oven to 475, pat dough in to a rectangle drizzle with olive oil and sprinkle with your topping. I used chopped green and black olives. Bake for 10 minutes for chewy bread or let bake 20 min for a bit crisper bread.
Now this next recipe I altered a bit and came up with a couple of tasty appetizers.
Parmesan Puffs
Ingred;
1/2c. water
1/4c. butter
1/2c. flour
2 eggs
3/4c. parmesan cheese
Heat oven to 375, lightly grease a baking sheet.
Bring the water and butter to a boil, whisk in the flour until it forms a ball. Remove from heat and dump into your mixing bowl, beat in the eggs one by one. Then beat in the cheese. Scrape sides, using a small scoop- scoop into small balls and place on cookie sheet. Bake for 15 min. until puffed and golden brown.
Now there are a few things you can do with these, the original recipe suggest dipping in marinara sauce. I made a butter garlic sauce to dip them in while they were warm, which was tasty. Then I dipped the tops of the remaining puffs in the butter and let cool then I filled them with a yummy cream cheese crab mixture-
Parm Puff Filling
Ingred;
4oz cream cheese
1/4c. immatation crab
1/4c. chopped olives
1/2t. salt
Blend all together with a food processor and pipe into the center of the puffs, refridgerate any leftovers.
Now mine are a little big because I haven't been able to find my small scoop since we moved, so I had to use a big one. But with the small one these would be such cute little appetizers! They were very tasty : )
Thursday, September 24, 2009
I just got a Letter.....
Actually it was more of a package really, a package full of treasures! When I went out to get my mail today there it was in my box, the girls and I opened it up and look, LOOK at my treasures!
These are from my Sweet big Sister B,
Candied French Violets
Candied Rose Petals
lots of Lavender
I am so excited! I will have to find something special to make with these, any ideas?
I have a recipe that I begged Sister B for all week, it requires the use of these-
They look wonderful, don't they.......
Well, as we all know, looks can be deceiving! These little fuzzy fibbers were half brown on the inside! I was totally disgusted. So instead of making 2 pies we only made one, cause that's all I got out of them.
Peel & slice peaches, arrange in the bottom of pie shell. In medium pan whisk together the next 5 ingredient until smooth & pour over peaches. Bake at 425 for 30 min.
Prepare the remaining ingredient. as a struesal topping, sprinkle over pie and return to the oven at 400 for another 30 min.
Garnish with unpeeled peach slices and a sprig of mint.
Now I couldn't garnish mine because of the peach shortage, so I gave my girls each a piece of the leftover pie dough and they made me some cute leaves to decorate the center.
Thank you Aunt B for the sweet gifts and for a wonderful recipe!
These are from my Sweet big Sister B,
Candied French Violets
Candied Rose Petals
lots of Lavender
I am so excited! I will have to find something special to make with these, any ideas?
I have a recipe that I begged Sister B for all week, it requires the use of these-
Here look again-
They look wonderful, don't they.......
Well, as we all know, looks can be deceiving! These little fuzzy fibbers were half brown on the inside! I was totally disgusted. So instead of making 2 pies we only made one, cause that's all I got out of them.
Aunt B's Vanilla Custard Peach Pie
Ingred;
1 deep dish pie crust
5 med. peaches
8 oz sour cream
3 large egg yolks
1c. sugar
1/4c. flour
2t. vanilla or buttershots
1/4c. butter
1/2c. flour
1/4c. sugar
Ingred;
1 deep dish pie crust
5 med. peaches
8 oz sour cream
3 large egg yolks
1c. sugar
1/4c. flour
2t. vanilla or buttershots
1/4c. butter
1/2c. flour
1/4c. sugar
Peel & slice peaches, arrange in the bottom of pie shell. In medium pan whisk together the next 5 ingredient until smooth & pour over peaches. Bake at 425 for 30 min.
Prepare the remaining ingredient. as a struesal topping, sprinkle over pie and return to the oven at 400 for another 30 min.
Garnish with unpeeled peach slices and a sprig of mint.
Now I couldn't garnish mine because of the peach shortage, so I gave my girls each a piece of the leftover pie dough and they made me some cute leaves to decorate the center.
Thank you Aunt B for the sweet gifts and for a wonderful recipe!
Wednesday, September 23, 2009
Volcanos and Scrubs
Body scrubs not the show Scrubs, I have never watched it.
Today I made a couple of scrubs for my Lil' Sisters B-day present, a Lemon hand/body scrub and a Peppermint Foot scrub. They both smell yummy yummy yummy!
Put the salt in your container, once again I am thanking Goodwill
for my 2 cute containers. Melt the coconut oil in a heat proof glass bowl or cup. I love my glass Pyrex measuring cups for this. When that is melted stir the remaining ingred. Pour slowly over the top of your salt, I used a fork to stir mine in. It's what I had handy and it worked pretty darn well :)
Close it up and label.
Follow the instructions from above. You could use all Almond oil or all Coconut oil, you could even use Olive oil ( but I hear it smells funny after a bit). You don't REALLY need the Lanolin, it's just an extra bonus for extra softness :)
You don't even need the Vitamin E oil, it does help to preserve this so it keeps longer. But if you are making small amounts or are sure it won't last long, couple weeks, I wouldn't bother with it.
I received a sweet award from Lee over at I want to Make that! Seeing all the fun things she's been making always inspires me to get crafting! Thank You Lee!For after school snack today we tried something different, it's a volcano pancake. I have never made one frankly they kind of scared me, what if it doesn't rise???? What then?
Well I finally made one and hurray! It rose just fine, I did have some tense moments early on in the cooking time but waited it out :)
I got my basic recipe from Allrecipes it's here- Volcano Pancake.
But I did a little altering (big surprise) and here is my version-
Volcano Pancake with Strawberry Sauce
Ingred;
3 eggs
1/2c. milk
1/2c.flour
pinch of salt
2T. butter
1t. rum extract
4T.strawberry preserves
4T. o.j.
1t. lime juice
Heat oven to 400, put butter in a 8x8 pan and set in oven until butter melts.
Beat together by hand the eggs, milk, flour, salt and extract.
Pour over top of the melted butter and return to the oven for 30-35 min. While its baking, whisk together the preserves, and juices. After the pancake is done cooking, let it cool a couple minutes then drizzle with the sauce and serve warm.
This was delicious, this is definately a keeper, and it has so many possible ways to change up the flavor! Good Stuff :) :) :)
Today I made a couple of scrubs for my Lil' Sisters B-day present, a Lemon hand/body scrub and a Peppermint Foot scrub. They both smell yummy yummy yummy!
Lemon Hand Scrub
1/4c. coconut oil
1/4c. almond oil
1t. liquid lanolin
1t. vitamin E oil
15 drops lemon oil
about 1c. epsom salts
1/4c. coconut oil
1/4c. almond oil
1t. liquid lanolin
1t. vitamin E oil
15 drops lemon oil
about 1c. epsom salts
Put the salt in your container, once again I am thanking Goodwill
for my 2 cute containers. Melt the coconut oil in a heat proof glass bowl or cup. I love my glass Pyrex measuring cups for this. When that is melted stir the remaining ingred. Pour slowly over the top of your salt, I used a fork to stir mine in. It's what I had handy and it worked pretty darn well :)
Close it up and label.
Peppermint Foot Scrub
1/2c. coconut oil
1/2c. almond oil
1t. liquid lanolin
1t. vitamin E oil
15 drops peppermint oil
1-1/2c. epsom salts
1/2c. coconut oil
1/2c. almond oil
1t. liquid lanolin
1t. vitamin E oil
15 drops peppermint oil
1-1/2c. epsom salts
Follow the instructions from above. You could use all Almond oil or all Coconut oil, you could even use Olive oil ( but I hear it smells funny after a bit). You don't REALLY need the Lanolin, it's just an extra bonus for extra softness :)
You don't even need the Vitamin E oil, it does help to preserve this so it keeps longer. But if you are making small amounts or are sure it won't last long, couple weeks, I wouldn't bother with it.
I received a sweet award from Lee over at I want to Make that! Seeing all the fun things she's been making always inspires me to get crafting! Thank You Lee!For after school snack today we tried something different, it's a volcano pancake. I have never made one frankly they kind of scared me, what if it doesn't rise???? What then?
Well I finally made one and hurray! It rose just fine, I did have some tense moments early on in the cooking time but waited it out :)
I got my basic recipe from Allrecipes it's here- Volcano Pancake.
But I did a little altering (big surprise) and here is my version-
Volcano Pancake with Strawberry Sauce
Ingred;
3 eggs
1/2c. milk
1/2c.flour
pinch of salt
2T. butter
1t. rum extract
4T.strawberry preserves
4T. o.j.
1t. lime juice
Heat oven to 400, put butter in a 8x8 pan and set in oven until butter melts.
Beat together by hand the eggs, milk, flour, salt and extract.
Pour over top of the melted butter and return to the oven for 30-35 min. While its baking, whisk together the preserves, and juices. After the pancake is done cooking, let it cool a couple minutes then drizzle with the sauce and serve warm.
This was delicious, this is definately a keeper, and it has so many possible ways to change up the flavor! Good Stuff :) :) :)
Monday, September 21, 2009
Krafting with Miss K- Knitting
Miss K finished a project last night that we wanted to share, she made this
for her baby doll
I can not knit to save my life, last year my Cousin introduced me to these, they're called the Knifty Knitter Loom. I have actually knitted scarfs with it!!! This year I plan on making hats for all the kids. I have posted more about this, and sites with patterns, on my other blog.
All of my girls love these, the two older can do it without any help, Miss M needs a bit more supervision :)
Moving on, I made these last week but have been slow in posting it.
I read about lotion bars on a blog a few months ago, there was even a link to
where you could buy them. Which I bookmarked,
we all know how I bookmark everything :)
I really wanted to buy one, lol, or two, but they are 15$ each!!! Add in the shipping and there was no way I could justify spending over 30$ on 2 little lotion bars. BUT I found a site online that had instructions to make your own! How cool is that?!?!!
As you can tell I was a little excited :)
So I made my own, actually I made about 6 of them,
Christmas is coming you know!
So here are a couple of them, I still need to come up with something cute to put them in-
And here is the recipe-
Sweet Bee Lotion Bars
Ingred;
1/4c. beeswax
1/4c. coconut oil
1/4c. cocoa butter
1/2t. vitamin E
1/2t. honey
Place beeswax in a heat proof bowl and microwave for 2 minutes, works best if you break it into pieces first, then add in the coconut oil and cocoa butter. Heat it in 30 second intervals stirring after each until its all melted together. Stir in the remaining ingred. Set in the fridge for about 15-20 min to cool it down a little. Pour into your molds, I used soap making molds- because they stand up to high heat. Make sure whatever mold you use isn't going to melt, this is very hot!
Let set for about 6 hours, or overnight then unmold.
These are really nice, but the next batch I make I am going to try using a little bit more beeswax so they are a little more solid. This recipe is pretty close to perfect though :)
In place of the honey, you could use any essential oil you like, or for a cold time bar use 1 T. of Vick's vaper rub. That is my next project, cold season is coming up quick.
Friday, September 18, 2009
Raspberry Buttermilk Cake
I found a reference to this cake in a comment left on a cooking site, someone covered this Lovely with lemon cream cheese frosting, WHY? Why would they do that??? I am not a fan of frosting anyway but to cover up this beautiful cake with it had to be a crime.
Anyway that is how my google search for Raspberry Buttermilk Cake recipes began.
I settled on this one from Gourmet, the directions were easy to follow, but the biggest reason- it had printable directions :)
Raspberry Buttermilk Cake
Ingred;
1c. flour
1/2t. baking soda
1/2t. baking powder
1/4t. salt
1/2 c. butter, softened
2/3c. sugar, plus extra to sprinkle on top
1/2t. vanilla
1 egg
1/2c. buttermilk
1c. fresh raspberries
Preheat oven to 400. I sprayed an 8" spring form pan with Pam.
Whisk together flour, powder, soda and salt.
In mixing bowl, beat together butter and sugar.
Beat in vanilla, than the egg.
Mix in half of the flour mixture, then mix in the buttermilk.
Scrape sides mix well, add in the remaining flour mixture.
Spread into cake pan and scatter the raspberries on top,
I then sprinkled the top with some turbinado sugar.
Bake fro 25-30 min. Let cool 10 min. before removing the side of the pan.
Cool completely.
Friday, September 11, 2009
Fairy Princess Bath Dust
I have been playing around making some fun things lately, and this was something I came up with when I needed a gift for my 7 year old niece. And of course I had to make 2 so that my girls could have one :)
Fairy Princess Bath Dust
The instructions for this are on my other Blog Krafting with Kids if any of you are interested in making some. The girls are so excited they are all arguing about who gets to take a bath first :) :) :)
Fairy Princess Bath Dust
The instructions for this are on my other Blog Krafting with Kids if any of you are interested in making some. The girls are so excited they are all arguing about who gets to take a bath first :) :) :)
Sausage Meatball stuffed 'Shrooms
At a wedding we went to last month one of the things that were served at the reception were some yummy mushroom caps topped with meatballs. I really wanted to try making some. I think the ones we had were more of a ground beef, sausage mixture but I only used sausage. Also once I had made these they didn't look quite like the picture in my head. So I am going to have to try again, I think I need to bake off the meatballs and then put them in the mushroom caps and heat them through. Even though they weren't quite what I had remembered these were really, really good.
Sausage meatball stuffed Mushrooms
Ingred;
1 pkg reg. mushrooms, the bigger the better
1/4 c. cream cheese, softened
1/2c. parmesan cheese
1T. parsley
1/2 lb ground sausage
1/2t. salt
1/2t. onion powder
1/4t. pepper
Remove the stems from the mushrooms and place top down in a 8x13 pan. In a small bowl mix together the sausage, parsley, parmesan cheese, & pepper. Make into small meatballs and set aside. In another small bowl mix together the cream cheese, salt and onion powder, put about 1/2t. full of this mixture into each of the mushroom caps and top that off with a meatball.
I baked these at 375, I didn't time them very well, it took 30-45 min. maybe. I just watched them and when the meatballs started to brown on top I took them out.
These were sooooooo good, this version will definitely be made again (in fact I am trying to come up with an excuse to make them this weekend). But I do want to try again to make something closer to what we had.
If any of you have had anything similar to this I would love to hear about it, and borrow your recipe! :) :) :)
Thursday, September 10, 2009
And the Timeline continues.....
I finally had time to sit down and write out a Timeline post.
Willoughby challenged her followers to post their own Timelines,
what a fun idea that was. So a few others Blog friends posted theirs as well,
Muddy Runner, 5th Sister, Gracey, if I missed anyone hollar k?
2009, Sept.
We are in a new house, in a new town, in a new State. Mr. L is starting his first year of Grad school to be a Bio-Chemist. I have a 5th grader, 4th grader, 2nd grader and one enthusiastic preschooler. This year I celebrated my 11th Wedding Anniversary, and my Hubby's 30th Birthday. In a month I will be celebrating my own 30th Birthday. I am missing my Family, but we have all made some great friends here. I am trying to figure out what I am going to do next year with all my kiddos gone all day in school, so many options! It will be the first time in 11 years that I will have 8 hours a day all to myself. To be honest I am a little scared.
2004, Sept.
I'm about 9 months pregnant with my 4th and last child. We already know it's a girl, Mr. L and K. wanted to know as soon as they could tell whether it's a girl or boy. They are hoping for a boy, and are still holding out with hope that the many ultra sounds we have had were wrong. This has been a hard pregnancy, I have been put on bed rest for the next month. With three small children under the age of 6 that is really fun :) My oldest child Mr. K just started Kindergarten, he is such a sweet, shy little man. Mr. L is starting his first year in college, so we are new to the whole college family thing :)
1999, Sept.
We are a new little Family of 3, I have a sweet little 5 month old baby boy. Mr. L is working at a vinyl window frame manufacturing company. The pay isn't too great, so he is looking for something else. In a month I will find out that we are expecting child #2, apparently birth control isn't 100% effective. And our first 2 children will only be 14 months apart.
1994, Sept.
I am 14 years old, I am the middle child of 7. The 5 of us that are at home are being Homeschooled. I am totally, completely horse crazy. I have 2 of my own, a POA that I have had since I was 8 and a new Arabian gelding that I am in complete LOVE with.
1989,
I am 9 years old, I ride 1 hour both ways on the bus to go to a small town school. In my class there is 1 other girl beside me and 12 boys. Boys are so dumb. I love to read, anything I can get my hands on. The Tarzan series by Edgar Rice Burroughs are my current favorite reads. I received the BEST gift a girl could get for my birthday last year, a horse of my own! A beautiful POA, Pony of America- which is a larger breed of pony, think small horse, a mare. I am one lucky girl :)
That is the end of my Timeline, I vaguely remember my 4 and 5 year old years but not really enough to tell you too much, I do remember climbing onto the chicken house roof, with my Big brother, to pick and eat green apples :)
Now go check out the other Timelines, there are even futuristic ones!
Thursday, September 3, 2009
Homemade Sugar and Salt Scrubs
Since I had the coconut oil I bought I decided to make some scrubs with it. If you have never used/seen coconut oil is has kind of the same look/consistency as shortening.
I wanted to make a sweeter scrub for a body scrub and also one to keep by the kitchen sink for my hands. So here we have our ingredients-
For the Salt Scrub I used-
Sea Salt
Coconut oil
an oil mixture of grapefruit, eucalyptus, peppermint & lavender.
For the Sugar Scrub-
turbinado or raw sugar
coconut oil
vanilla extract
To make this you need to fill you container about 3/4 of the way full with your sugar or salt. Melt the oil in a glass cup in the microwave, about 30 sec. a little less maybe. Add in your oils(5-10 drops) or extract(1t.) Stir it in. Slowly pour the oil over the salt/sugar and stir it in until you get the consistency that you like. Cover and enjoy! :)
The vanilla sugar one, oh boy this stuff smells good enough to eat :)
I put some of each of these in cute little glass containers that I bought at goodwill. And labeled them to give as a gift.
Since we moved here there is a lady from church that made an extremely kind and thoughtful gesture to my family. Long story short she arranged a big get together, spur of the moment, to introduce Mr. K to some other boys his age so he would feel more comfortable here- which he now does.
So I packaged these up with the body butter I made,
and a couple loaves of Downeast Maine Pumpkin Bread.
To give to her as a Thank You. When someone does something like that to help your child it really touches your heart.
Homemade Beauty- Yummy Body Butter
I stumbled upon a really fun blog, she has great projects and a wonderful sense of humor- it's called- I want to Make That! One of the posts she does are called Make me Monday, where she makes a fun project and shows you how.
A week or 2 ago she tried out a recipe for Body Butter that didn't set up because she substituted an ingredient, you can read all about it here. It sounded so good that I really wanted to try it, so I picked up the ingredients for it. Here we are all lined up-
I went with a mixed oil of clove, birch, rosemary, cypress & marjoram, from my oil box.
I really liked the idea of a clove smelling butter. I placed the coconut oil and cocoa butter in a glass Pyrex measuring cup, and placed in the microwave for about 30 seconds then stirred together well.
Then I stirred in about 10 drops of the oil mixture, -You could use any oils you like I would just make sure that if they are NOT ones that are mellow (and that is not quite the word I wanted but the brain isn't thinkin real well) enough to put straight on your skin don't use more than 10 drops. If you use a milder (ahah! That's the one I wanted earlier!) oil like orange, lemon, tea tree, you can use more. Just add a few drops, stir and sniff, if it's not strong enough add a couple more- thats how I measure things around here :)
This did have a bit of a chocolate smell that seemed odd with the clove smell, but I didn't smell it after it had set.
Now pour it into your container- I got mine at Ross for 2$, it had some mints in it. I just washed it, dried it & decorated it a little- Wallah!
Since I am a bit impatient, after this had cooled I put it in the fridge with the lid on to see if it would set faster, and it did :) in about 1 hour. The oils seperated a little on top, but I just stirred them in a bit, with my finger, then rubbed some on my hands. YUMMY, smells good round here!
Next batch I am making with a little bit of Almond extract, sigh.
Good Stuff, Thank You for sharing this recipe Lee!
Absentee Blogger
I have been a little absent lately. Not only did Hubby & the Kiddos start school, I was fast approaching a deadline I needed to meet. And that was keeping me pretty busy see-
I was given a job of scrapbooking a first year album and I wanted to have it done by this weekend. I finished it yesterday- 106 pages in 1 week, the creative part of my mind is numb now :)
One of my favorite pages-
But I am done, and now I can think about other things :)
Like homemade body butters and scrubs! And Pumpkin Bread! And finally having cooler weather, Yay!